Successful Homeschool Days Require Meal Planning {5 Days of Homeschooling Essentials}

Successful Homeschool Days Require Meal Planning

No matter how much I try to convince my husband and children otherwise, they just don’t believe that they can go without eating! Just kidding:-) But in all reality, making good healthy meals can take a lot of time out of an already busy day. In the end, it is worth it, but it does require some planning and prepping. Here is how we accomplish this is our house.

{This post may contain affiliate links}

*Plan a menu. This is crucial for both ease in grocery shopping and ease in cooking. Our favorite way to do this is to use Plan to Eat. With this online tool I can store my own recipes, plan my menu, and print off my grocery list. I can add in multiple stores and Plan to Eat remembers where I buy the items. I have one list to take shopping even though I go to three different stores. It does takes some time to put your recipes in, but it is worth it. Now I know exactly what we are eating each day and I don’t forget to buy any ingredients. This also saves me time since I don’t have to keep running back to the store! *If you sign up for Plan to Eat and want to “follow” my recipes, my username is edeemarie.🙂

Simple Meal Planning - Plan to Eat

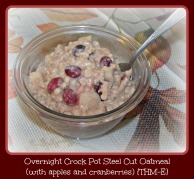
*Have breakfast prepared for the morning. We don’t eat much cereal in our house, and my kids wake up hungry. So having breakfast ready for the morning is essential to our day running smoothly. Typically, I make double or triple batches of recipes so we can eat the food for at least 2 days in a row. That may include things like oatmeal bars, muffins, breakfast cookies, sweet breads, or overnight oatmeal. We save things like pancakes and eggs with bacon for the weekends when we don’t have school to worry about.Overnight Crock Pot
*Easy meals go a long way. I don’t want you to get the impression that I am cooking gourmet meals all day long. With breakfast done the night before, I don’t have to worry about that in the morning. Our lunches include simple things like Salad in a Jar, crackers and cheese, peanut butter and jelly on rice cakes, yogurt and fruit, things the kids can mostly make on their own.  There are also some evenings that I just don’t have the time or energy to make dinner. Right now we are out of the house 5 out of 7 days so we need easy. We may just have lunch meat and cheese wraps with some cut up vegetables, or we may have breakfast for dinner (hurray for bacon and eggs!). Easy meals are good. I like easy:-)

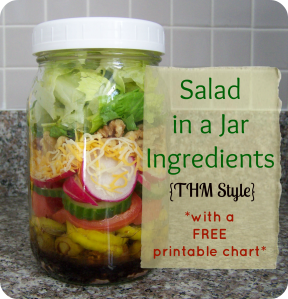
Salad in a Jar Ingredients {THM style} *with a FREE printable chart*

The health of my family is very important to me, so I make it a priority to feed them as healthy as I can. But this does take some time and preparing. How do you prepare and make sure you keep your family well-fed?

Come check out some of the great posts about homeschooling essentials from my Crew-mates!

Amanda @ Hopkins Homeschool The Library

Jennifer @ Royal Little Lambs Know Your Enemy

Sarah @ My Joy-Filled Life 5 Homeschool Supplies I Can’t Live Without

Debbie @  Debbie’s Homeschool Corner Fun With Hands-On Science

Lisa Marie @ The Canadian Homeschooler Find Support

Laura @ Four Little Pengins Essential Tools

Chareen @ Every Bed of Roses Homeschool 4 FREE Resource Lists

Dinah @ The Traveling Classroom Family Friendly Field Trips

Dawn @ Guiding Light Homeschool Hands-On!

5 Days of Homeschooling Essentials

Salad in a Jar Ingredients {THM style}


Salad in a Jar Ingredients {THM style} *with a FREE printable chart*

How many of you have seen pins on Pinterest about “salads in a jar”? I have seen quite a few, and we are loving them in our home! They make such quick, easy, filling, and healthy lunches…perfect for a lunch on-the-go or a fast lunch for a busy homeschooling mama. The possibilities are endless when it comes to creating new salads.

Ideally, you can make several “salads in a jar” at the beginning of the week and just grab one out of the refrigerator every day. It sure saves a lot of time cutting, slicing, and dividing everything at once instead of doing it each day! For my salads, I put the dressing in the bottom of the jar. My husband likes to add his dressing right before he eats:) Add the more wet ingredients at the bottom so they don’t get everything else slimy. Layer your ingredients, add the lettuce (or put that in a separate container…again, the preference of my husband!), close the jars, and you are done!

I have seen some people use vacuum sealing to keep it fresher for even longer, but we have done just fine without using a sealer. I don’t expect for the salads to stay in there for more than about 5 days anyway, so we haven’t found a need for that yet. Maybe if I can find one cheap somewhere or pick one up at a garage sale this summer we will give it a try:)

For all of you Trim Healthy Mamas out there I have created a printable list of ingredients for these salads based on each meal type. It makes for a nice reference when you are throwing a salad together, even if it isn’t in a jar! Just click the link below to print off one of your own.

Salad in a Jar Ingredient List

Even during the cold winter months, these salads are perfect with a steaming cup of hot soup. I would love to see some of your salad creations! Do you have any other ingredients you enjoy on salads?

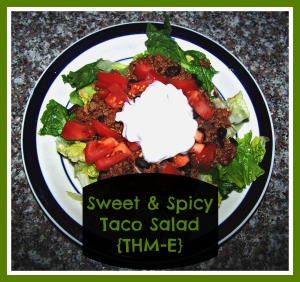
Sweet & Spicy Taco Salad {THM-E}

*This post may contain affiliate links which means I make a small commission on any purchases made. Thank you for blessing our family!*

Sweet & Spicy Taco Salad {THM-E}

I know that Taco Salad can often be made with fatty ingredients (perfect for a Trim Healthy Mama S meal). But this one will be a little bit different. The recipe was inspired by one from my good friend that included Catalina dressing. It is so good! Want to give it a try?

Here are the ingredients needed.

1 lb. lean meat (we used grass-fed beef, but you could also use shredded chicken, ground turkey, or lean ground beef that has been rinsed in boiling water to remove the excess fat)

1 medium onion, chopped

3 garlic cloves, minced

8 oz. tomato sauce

2 cans of black beans (or a different bean if you prefer)

2-3 T. Apple Cider Vinegar (I use Bragg’s)

1 T. homemade Truvia, or a couple of pinches of Stevia (or 2 T. Honey if you are not using THM sweetener)

1 t. of each Real Salt and dried cilantro

1/2 t. of each cumin, chili powder, and paprika

a nice pinch of cayenne pepper

lettuce, Greek yogurt, tomatoes, or any other low-fat toppings

To prepare the salad, brown the meat with the onions and garlic on medium heat (unless you will need to rinse the meat…then you will need to brown them separately using just a little bit of oil). Add the following ingredients: tomato sauce, ACV, sweetener, salt, cilantro, cumin, chili powder, paprika, and cayenne. Then add in the beans. This mixture needs to simmer a bit to thicken up (about 20-30 minutes). If you need to serve it right away you can try adding about 1/2 tsp. of glucomannan powder (sprinkle it in while mixing…don’t dump it in).

To make it an E meal, serve it over a nice helping of lettuce or other greens. You can top it with some fresh tomatoes and a nice dollop of non-fat Greek yogurt. *To make the Greek yogurt taste more like sour cream I find it best to add a little bit of salt to it.*

Enjoy!

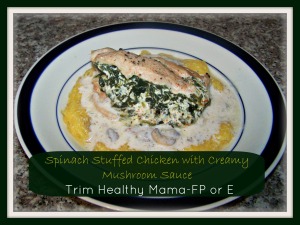
Spinach Stuffed Chicken with Creamy Mushroom Sauce {THM-FP or E}

*This post may contain affiliate links which means I make a small commission on any purchases made. Thank you for blessing our family!*

Spinach Stuffed Chicken with Creamy Mushroom Sauce

Well, after a little break, I am back into Trim Healthy Mama mode. I will write a little bit more next week about what brought me here, but for now I am going to share with you what we had for dinner last night. Right now I am in the middle of a Fuel Cycle, and last night was a Fuel Pull day (which means low-carb and low-fat). It can be tricky coming up with meal choices for these days, so I decided to come up with one of my own!

Here are the ingredients you will need for this recipe:

1 lb. chicken breast

1 C. cooked spinach (I used frozen)

1 C. Greek yogurt (0% fat)

1/2C. + a few T. chicken broth

1 small can of mushrooms

spices (Real Salt, pepper, dill, cayenne, or whatever your spices of choice may be)

Glucomannan Powder

“noodle” of choice (I used spaghetti squash to make this a FP)

Directions:

If you are using spaghetti squash, start cooking it. Another FP option would be cauliflower rice, which would also need to start cooking.

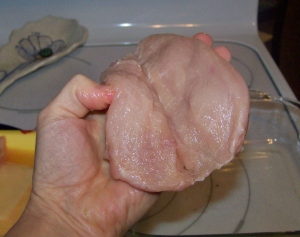
Preheat oven to 350 degrees. Butterfly each chicken breast, leaving room for the filling. The other option is to pound it until it is thin, but that is too much work for me!

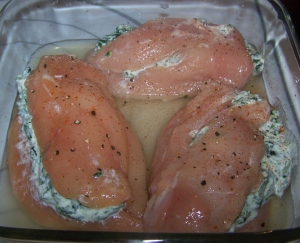
102_1755Now get the filling started. In a small bowl, mix the 1 C. spinach (thawed and drained) with 1/2 cup plain Greek yogurt (if your yogurt is really thick you may want to add a little broth). Add in your spices: I used 1 t. salt, 1/2 t. fresh pepper, and a pinch of cayenne. Feel free to use whatever your family will enjoy.

Pour a couple of tablespoons of broth in the bottom of your baking dish (mine was an 8×8 glass dish). This keeps the chicken from sticking. Now stuff that chicken! Lay the chicken pieces in the pan and cover it with foil. Bake for about 30-45 minutes (depending on how thick your chicken is).102_1756

While the chicken is cooking, it is time to make the creamy sauce. In a small sauce pan, mix 1/2 cup chicken broth with 1/2 cup Greek yogurt. Add in your spices. I used 1 t. salt, 1/2 t. pepper, 1/2 t. dill, and a tiny pinch of cayenne (you could also use paprika if you don’t want it too spicy). Add in 1/2 t. Glucomannan Powder, whisking until mixed. Simmer this on a low heat just until it warms and starts to thicken. Don’t let it cook too long or the yogurt will separate! Add in 1 small can of mushrooms.

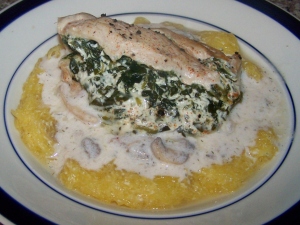
Once the chicken is done, simply layer your spaghetti squash (or cauliflower rice), then add the creamy mushroom sauce, and top it with your chicken. Yummy, creamy, and a fuel pull! To make this an E you could easily put this over either quinoa or brown rice.

102_1759

This is the beginning of what will hopefully be a lot of easy and delicious recipes to help you eat a little better and love the food you eat. Don’t miss any new recipes…you can subscribe to our blog by email, follow us on Facebook, or follow us on Twitter.

Enjoy!

The Homemaker’s Mentor {review and GIVEAWAY!}

header

Call me old-fashioned, but one of my goals in life is to become a great homemaker. You know the kind of homemaker I mean…the wife and mother that is always prepared with delicious meals and a tidy home that is welcoming to anyone that may enter. It can be hard to find worthwhile products that will help me not only achieve this goal, but also equip me with the skills to pass them onto my children.

Well, I found a very worthwhile source that can take me down the road to becoming a great homemaker. It is a collection of vintage books and materials called the Homemaker’s Mentor. The kids and I have had so much fun working on some of the projects and recipes from this CD. We have done several homemaking projects (including cooking and sewing) and have only begun to sample all of the wonderful books contained! Below are some of the covers of the books included in this collection.

mini-lessoncovers-4rows

As we scrolled through many of the books, I had my kids pick out some things that looked interesting to them. So they chose a few of the projects…and a few of them I chose too:) There are so many good things we weren’t even able to do yet! Thank goodness we have the CD to keep because we will be using it A LOT! We are using the lessons in a type of “homemade” homemaking class that is directed by the interests of the kids. Here is a little sampling of some of the projects we completed.

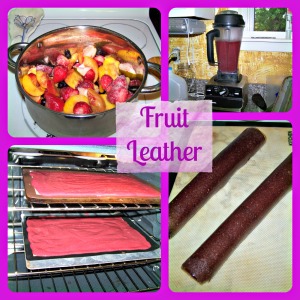
Fruit Leather

This is the first time I have ever made Fruit Leather, and it turn out really well! I let the kids pick out what type of fruit they wanted, which ended up being a combination of fresh and frozen. This is one snack I am happy to give the kids!

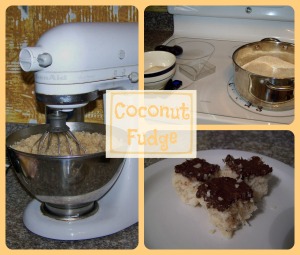
coconut fudge

I have never been what you would call a candy maker. But when I saw a recipe for Coconut Fudge, I knew I needed to try it…I love all things coconut! My only problem was that I didn’t have a candy thermometer. So the “fudge” turned out more like the world’s best coconut macaroon! I added some melted chocolate to the top too:)

Embroidery

The actual patterns in the embroidery book were a little too much for kids just starting, so we made up our own and used the techniques from the book to complete them. What a great exercise in fine motor skills! Too bad Caspian’s “good luck” embroidery wasn’t enough for the Cleveland Indians to win:(

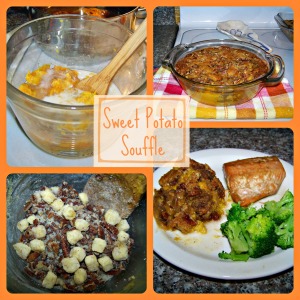
Sweet potato souffle

This Sweet Potato Souffle tasted more like a dessert than a side-dish! It went perfect with our dinner of glazed salmon and broccoli. We will be bringing this recipe out again…especially for the holidays!

quilt

Aurora was so excited to help make a quilt! She is planning on using it with the American Girl doll she is hoping to get for her birthday present in a few weeks. She helped me cut the pieces, arrange them, trim the thread, and put it all together. She loves it!

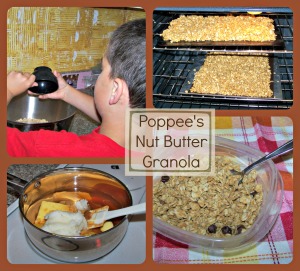
granola

Oh, the yummy granola! The CD has several different recipes for granola, including one made just for Caspian. Why? It has no raisins! The boy does not like raisins at all. So this was one of his favorites. We did add a few chocolate chips because you just can’t have peanut butter without a little bit of chocolate…right?

*ADDED BONUS*

Thanks to the generosity of Jim Erskine, the man behind The Homemaker’s Mentor, I am going to give you the recipe for this granola! If you like peanut butter, it is sure to be a hit!

POPPEE’S NUT BUTTER GRANOLA

Mix in a large saucepan and mix and heat until all combined and melted on medium heat:

*1/2 cup expeller pressed coconut oil

*1/2 cup butter

*2 cups crunchy peanut butter

*2 cups brown sugar (I did reduce this a bit)

*1/2 cup water

*3 tsp. vanilla

Put 6 cups of old-fashioned rolled oats + 6 cups of quick-style oats in a large bowl. Pour the warm peanut butter mixture over and mix well with a large heavy spoon. Place mixed granola into a greased large roasting pan. Bake at 325 degrees for 20-30 minutes stirring once. Cool and store in a sealed container on the shelf. Refrigeration not needed. Stays fresh approximately 2-3 weeks in a sealed container.

So have I convinced you yet that you will love this CD?! The price for this great collection all on 1 convenient CD will be $37 with free shipping (regular $47) until October 18th.

But, I am also giving away a FREE CD to 2 lucky people in a giveaway!!! Just click on the link below for a chance to win! (If you don’t live in the US, the files will be sent as a zip. file instead of a CD-Rom.)

You can also enter for a chance to win the MEGA-GIVEAWAY…valued at over $400!

Click here or on the picture below!

mega-giveawayHMM

Want to see what other reviewers thought (or enter for more chances to win a free copy of The Homemaker’s Mentor)?

Just click here!

The Homemaker's Mentor disclosure

Tasty Tuesday: Cooking…Without a Stove

49740_campfire_sm
During our latest impromptu kitchen remodel I was left in quite the predicament. Normally I am a planner; I like to have everything planned down to the last tiny detail. Well, I really dropped the ball on this one. In my mind moving our stove out of the kitchen to lay the ceramic tile would not be a big deal. I would just plug it into the outlet in the dining room, right? WRONG!

Why did I not think about the special 3-pronged cord the stove had?! Because of my lack of thinking things through I was left for several days without an oven or a stove top, or even access to most of the kitchen. Now what was I going to feed my family?

Thankfully I had a feeling before I put in my last Azure Standard order that I needed to get some “easy” foods. Looking back I see it was God’s provision! Without these food we would have had a tough time feeding 4 hungry children. Keep in mind that we almost NEVER have boxed cereal…it is just not something we do. But we did make an exception for these “healthier” cereals, and I am so glad we did! So here are some ideas of what we ate for our meals.

BREAKFAST
Envirokidz Cocoa Crisps with Almond Milk
Envirokidz Gorilla Crunch with Almond Milk
-Pumpkin Bread made with Pamela’s Baking Mix (we used Grandma’s stove to bake this bread…thank you, Grandma!!! I made 2 loaves to last us a couple of days.)

LUNCH
-Homemade Peanut Butter & Jelly on Rice Cakes
Cheese & Crackers
-Hummus & Crackers
Yogurt & Fruit

DINNER (this was the trickiest meal of them all)
Hamburgers on the grill with salad and chips
-Breakfast for dinner (pancakes on the griddle made with Pamela’s Baking Mix, bacon, sausage, and watermelon)
-Hobo Packets (ground beef, potatoes, onions, carrots, and steak sauce wrapped in foil and cooked on the grill)
-Grilled Chicken Salad (thank goodness our kids actually enjoy eating salad!)

We survived without a stove, and the best part is I have a wonderful new convection stove now that I LOVE!!! So if you had to live without a stove for a few days, what type of foods would you eat?

*Clip art courtesy of http://etc.usf.edu/clipart/.

Tasty Tuesday: Spaghetti Pie

102_1451

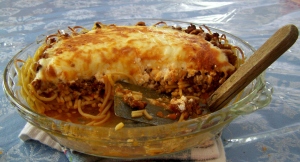
Does your family have a go-to recipe for get-togethers and birthdays? This recipe is one of the top choices in our family, and has been for years. I am not sure where the recipe originally came from, but it is so good! It is kind of like a cross between lasagna and spaghetti…and who doesn’t like dinner shaped into a pie plate! As much as I try to limit dairy in our house I am just not sure this one would work dairy free. I can take the gluten out by using rice noodles, so that is at least a start!

Here is the list of ingredients:

8 oz. spaghetti noodles (you can use rice noodles to make it gluten-free!)

1 egg

1/4 C. parmesan cheese

2 T. butter

1 lb. ground beef

1 small onion, diced

1 small pepper, diced

1 jar spaghetti sauce

1 C. cottage cheese (or ricotta cheese)

1 C. mozzarella cheese

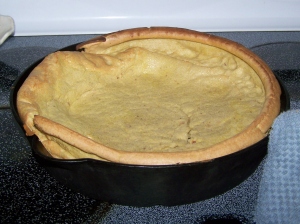
Preheat oven to 350 degrees. Start some water boiling for the pasta. In another pan brown the ground beef, onions, and peppers. Once the pasta water is ready cook the noodles until they are still a bit crunchy (not mushy). Drain the noodles and while they are cooled but still a bit warm add in the egg. If the noodles are too hot you will scramble the egg, and that is not what you want. Add the butter and parmesan cheese to the noodles. Arrange the noodles in the bottom of a pie plate and spread up the sides (it won’t be perfect and that is OK). Mix your browned ground beef mixture with the spaghetti sauce and spoon over the noodles. Make an indentation in the middle of the spaghetti mix and spread the cottage cheese in. Top this with the mozzarella cheese. Bake for 20-30 minutes. If the cheese isn’t browned I usually turned the broiler on for a few minutes, but that step isn’t necessary. Let it cool and bit, slice it up, and enjoy!

Hope your family loves this recipe as much as mine does!

Tasty Tuesday: Puffed Pancake

100_1437

Today’s recipe is my go-to for a last-minute, super easy breakfast for this kids. This puffed pancake is what I make when I run out of time the night before to make a breakfast. If Caspian liked eggs more, I would probably be making this at least once a week (so hard to please everyone!). The original recipe can be found here on one of my favorite blogs for gluten-free, dairy-free, and refined sugar-free foods: The Spunky Coconut. The only thing I changed is how I put the recipe together. A few years ago my wonderful husband blessed with my very favorite kitchen appliance: a Vitamix blender. It has made kitchen prep so much easier! And with recipes like this one I can just throw everything in the blender and it is done! Isn’t he wonderful?! Here are the ingredients, which can all be found through my favorite co-op…Azure Standard.

1/8 tsp sea salt
1 tsp cinnamon
1/4 cup tapioca flour (I have also successfully substituted with arrowroot powder)
Isn’t that a nice and simple ingredient list? I usually double the recipe and keep the other half in the refrigerator until the next morning. I bake this in my Cast Iron Skillet. Preheat the oven to 500 degrees and put your oven safe skillet in there to heat up too. When the oven is ready put a small scoop (maybe about 1 tbsp. or 2) of coconut oil in the bottom of the pan. Add the batter and put it back in the oven for about 10 minutes until it is light golden brown (and nice and puffy!). Couldn’t be easier! You can top it with just about anything. We have tried fruit that has been warmed up on the stove top with some coconut oil and cinnamon, but the kids like it with maple syrup too. Any way you have it is great. With this breakfast the kids actually stay full for a while. So if you are looking for something simple but delicious for breakfast, give this a try!

Tasty Tuesday: Sloppy Joes in a Bowl

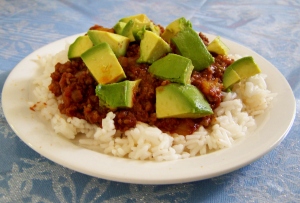
I think it is time for “Tasty Tuesday” to feature a savory dish since I have been focusing on sweets lately. This dish is one of my favorites and can be made easily (a huge bonus!). I didn’t do very much to alter this recipe but here is the original.

100_1433

Ingredients for Sloppy Joes in a Bowl:

Here is how I put it all together. First, mix the water and beef stock to use for the rice. Bring to a boil and cook according to your rice package suggestions. While the rice is cooking, brown the beef with the onion, pepper, and garlic. Once those are cooked, add in the rest of the ingredients until they are all combined. Now how easy is that?! I love to top mine with some diced avocados (not necessary- I just love avocados). You could also top it with cheese, sour cream, diced onions, or anything else that sounds good to you.

Sometimes eating gluten-free means thinking out of the box in order to enjoy certain foods, but with a little creativity you will never miss the old way of eating!

Tasty Tuesday: Fruit-Filled Oatmeal Bars

100_1408

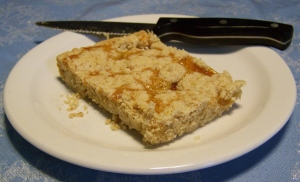
This week’s recipe comes from Cassidy’s Craveable Creations. The kids cheer when I tell them I am making oatmeal bars for breakfast. It is an easy recipe to make and I usually double it so we can get at least 2 days of breakfast from it. Here is the original recipe. I have made a few modifications to make it easier and cheaper since I don’t buy almond flour. The following are the ingredients needed (again, everything can be found through Azure Standard).

1/2 C  Almonds
1/4 Tsp. Baking Soda
1/8 Tsp. Salt
1 C Oats (I use old fashioned rolled oats)
1/2 C Organic Butter-softened (you can use Earth Balance if you need dairy free)
1/2 – 3/4 C Jam Of Choice (we use all fruit jam- our favorite is strawberry!)
Here is the easiest way to assemble these bars. Place all dry ingredients into a food processor. Process until all ingredients are incorporated. Then add the butter and process until it looks like cookie dough. Press about 2/3 of the mix on the bottom of a glass pan. Then spread the jam on top of that layer. Finish the top of the bars with the rest of the mixture (just drop crumbles on top and it will spread as it cooks). Bake at 350 degrees for about 35 minutes. There is also a grain free version if you prefer. This recipe is so easy and delicious. If my kids had to pick their favorite breakfast, this would be it! Enjoy:)